
 Anuradha
 21 Apr 2026
 LinkedIn
Creating a strong online presence is essential for any business, brand, or creator. One of the most powerful platforms to achieve this is Facebook. A Facebook Page allows you to connect with your audience, promote your services, and grow your brand online. In this guide, you will learn exactly how to create a Facebook Page step by step.
A Facebook Page is a public profile designed for businesses, brands, and creators. Unlike personal profiles, pages allow you to reach a wider audience and use marketing tools like ads and insights.
Follow these simple steps to create your page:
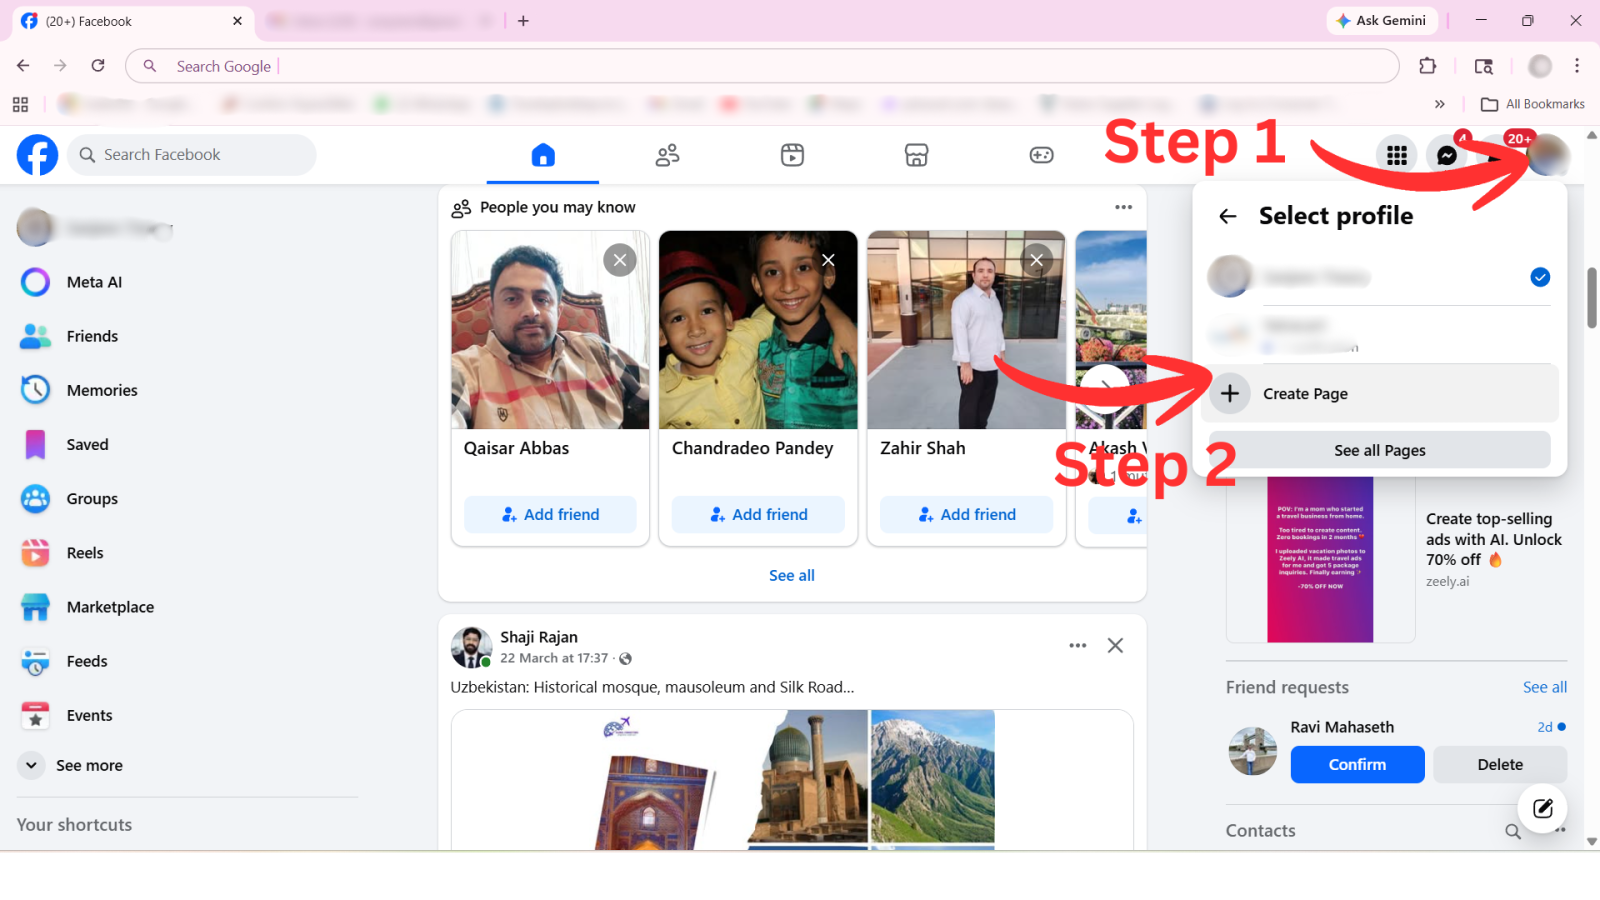
First, open Facebook on your browser or mobile app and log in using your personal account.
Note: You cannot create a Facebook Page without a personal profile.
After logging in:
Go to the top right corner of the screen
Click on your profile icon
This will open a dropdown menu with multiple options.
Now, look for the “Create Page” option in the menu and click on it.
If You Don’t See the “Create Page” Option. Sometimes, if you already have multiple pages, the “Create Page” button may not appear directly.
In that case:
Click on See All Profiles, A new panel will open, Scroll down
You will find the “Create Page” option at the bottom
Then click on it to proceed.
This way your steps are:
Login → Profile Click → Create Page → (If not visible → See All Profiles → Create Page)
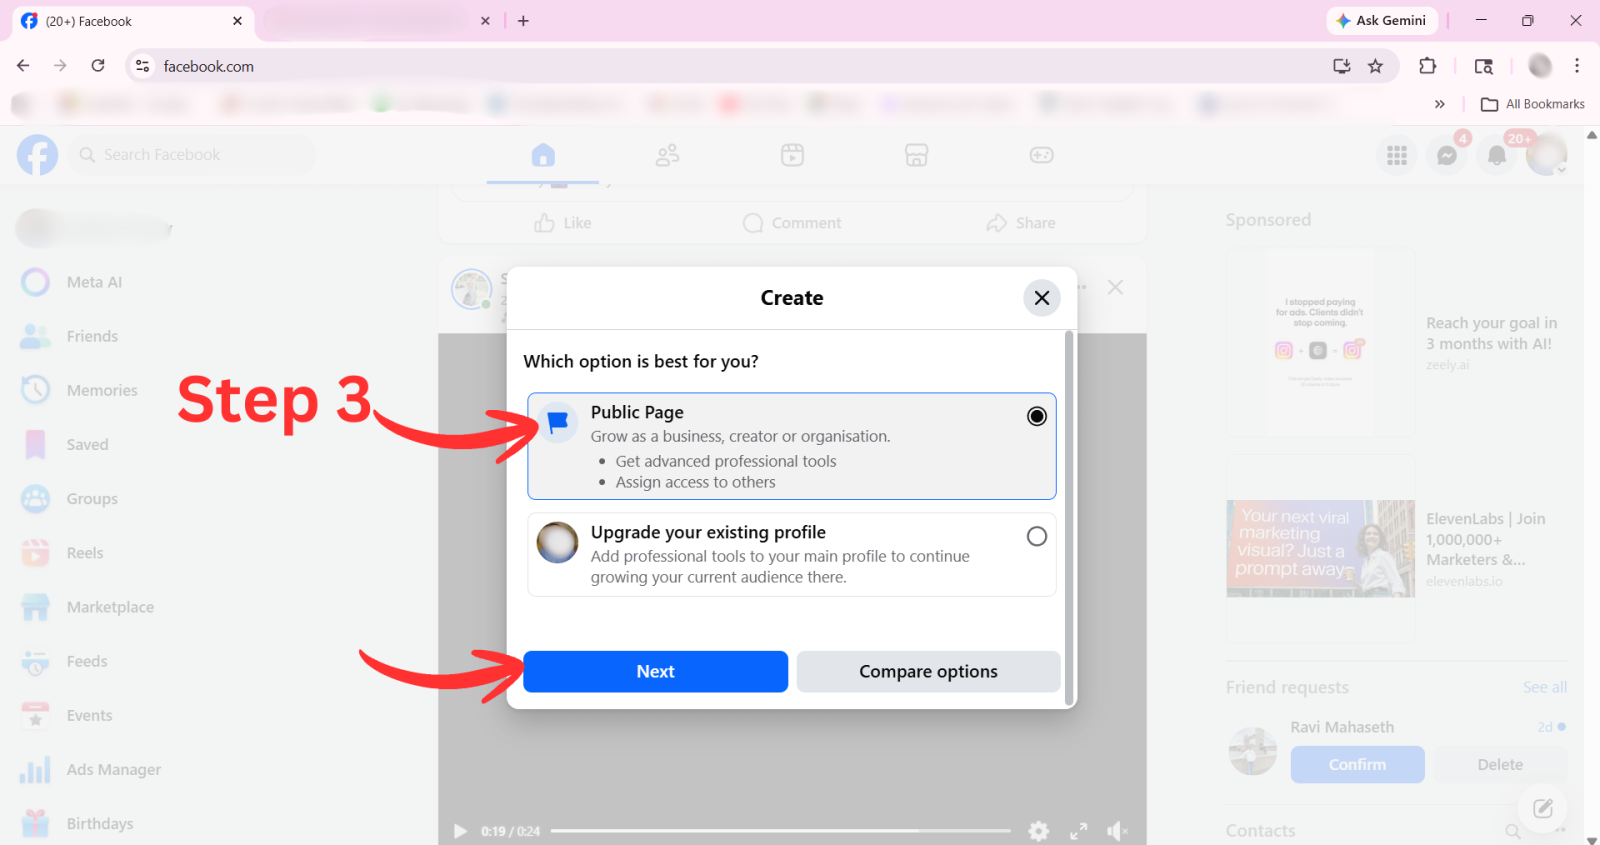
After clicking on Create Page, a pop-up will appear on your screen asking:
“Which option is best for you?”
You will see two options:
1. Public Page (Recommended)
This option is for businesses, brands, creators, and organizations. It gives you access to professional tools. You can manage your page and even assign access to others
To create a Facebook Page, select “Public Page.”
2. Upgrade Your Existing Profile
This option is used to convert your personal profile into a professional one. You can ignore this if you want to create a new page
What to Do Next
Select Public Page, Click on the “Next” button
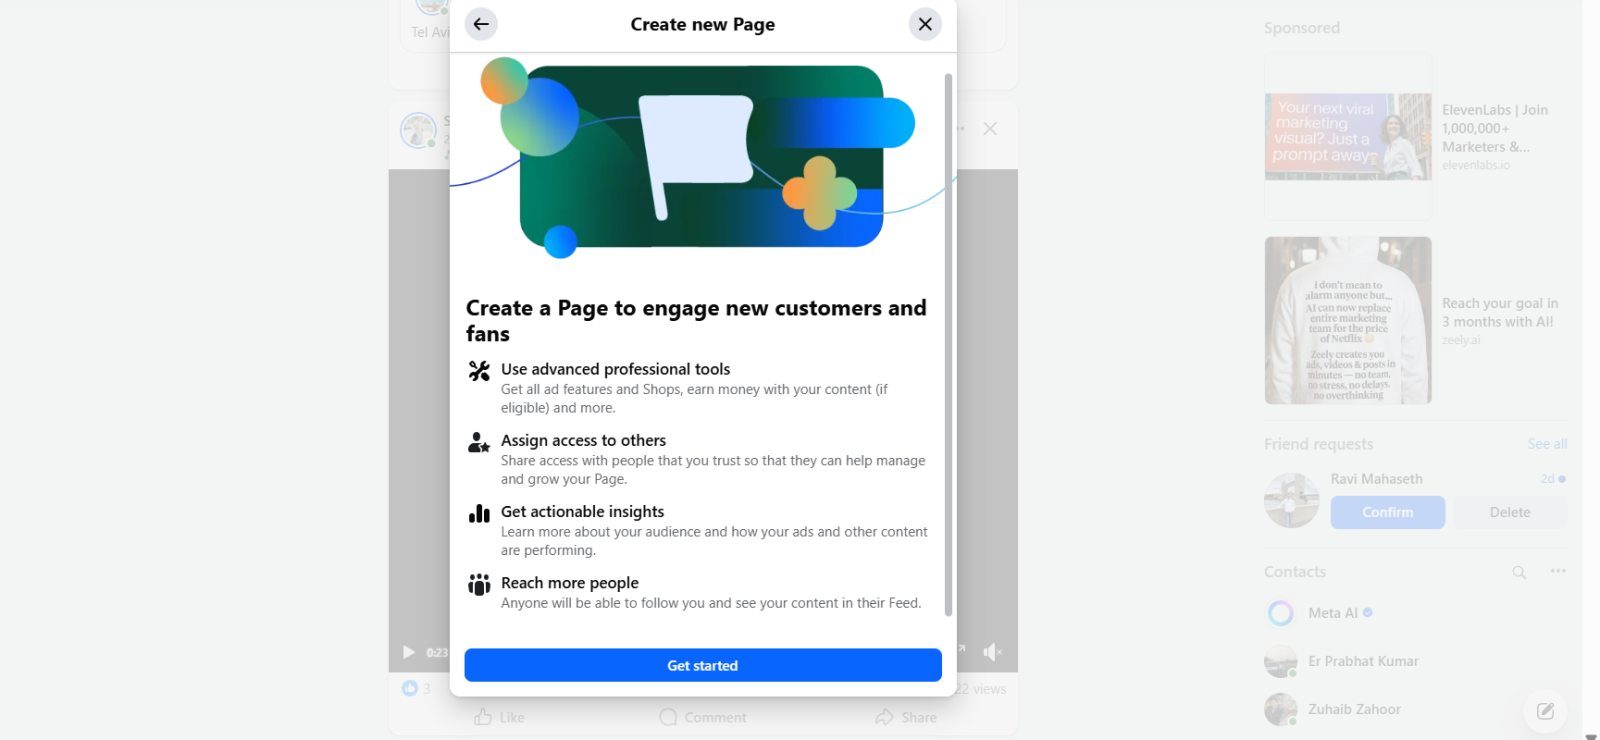
After selecting Public Page and clicking Next, a new screen will appear with information on creating a Facebook page.
This screen explains features like:
Professional tools
Insights and analytics
Audience reach
Access management
You don’t need to change anything here.
What to Do Next
Simply click on the “Get Started” button at the bottom
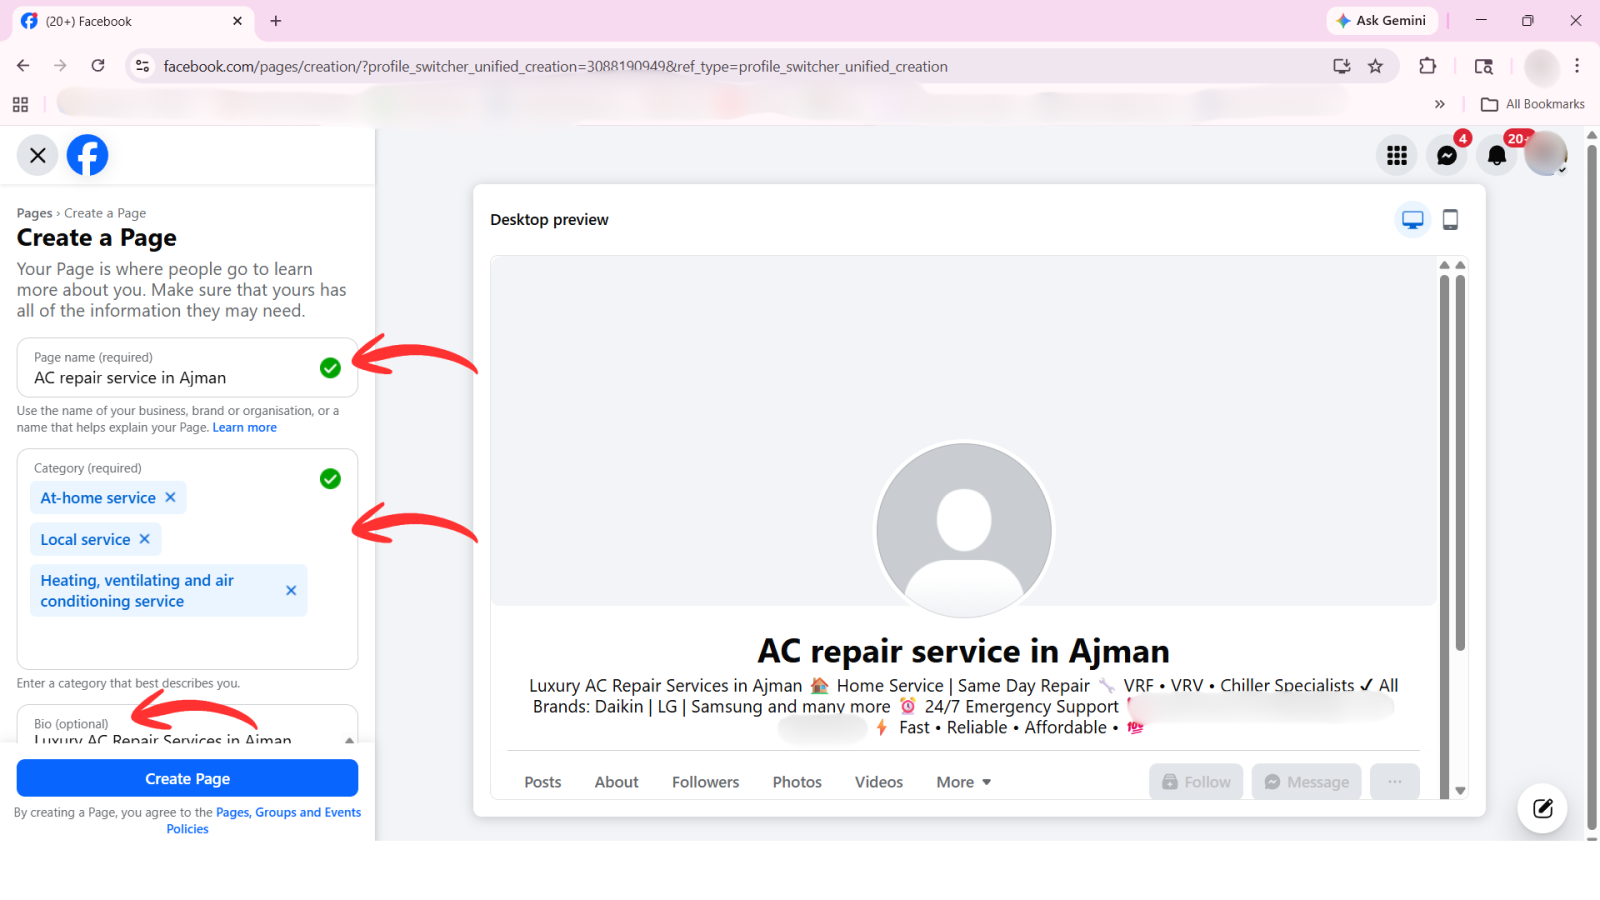
After clicking Get Started, you will be taken to the Create a Page section on Facebook.
Here, you need to fill in your basic page information:
Enter your business or brand name
Example: AC Repair Service in Ajman
Make sure the name is clear, relevant, and easy to understand.
Choose categories that best describe your business
Examples: At-home service, Local service, Heating, Ventilating & Air Conditioning Service
Select the most relevant categories so people can find your page easily.
Write a short description of your business that Explain what services you offer. Keep it simple and informative (1–2 lines are enough)
What to Do Next
After filling all details, Click on the “Create Page” button at the bottom
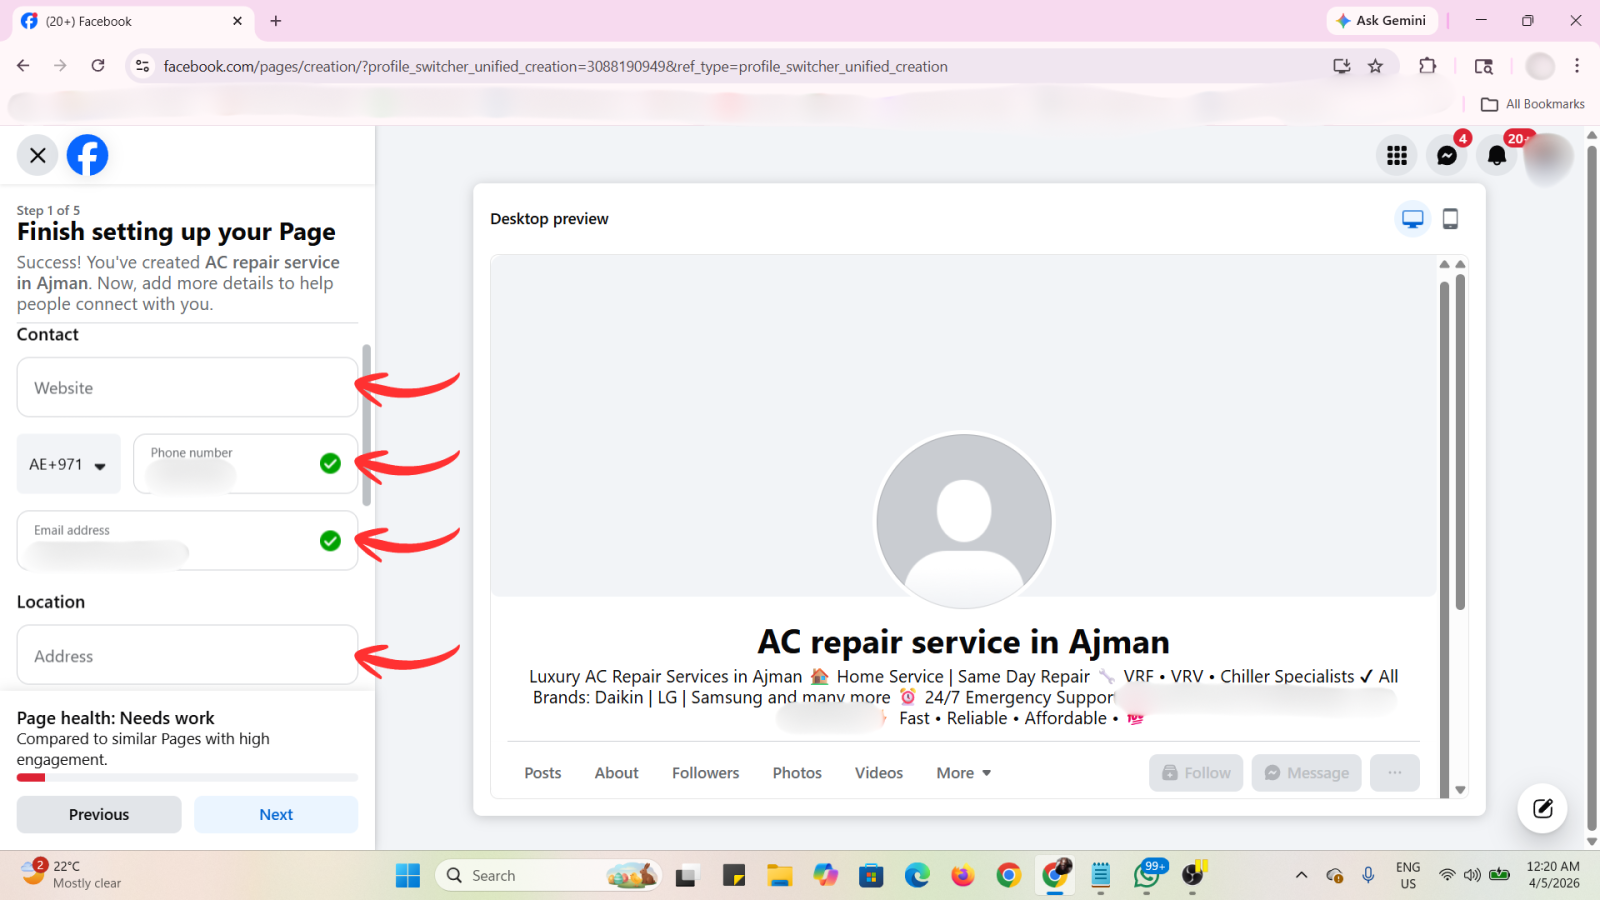
After clicking Create Page, the next step is to add your contact information on Facebook. This helps people easily connect with your business.
You will see options like:
Phone Number → Add your business contact number
Email Address → Enter your official email
Website → (Optional) Add your website link
Location / Address → Add your business location
Fill in the required details and Click on Next to continue
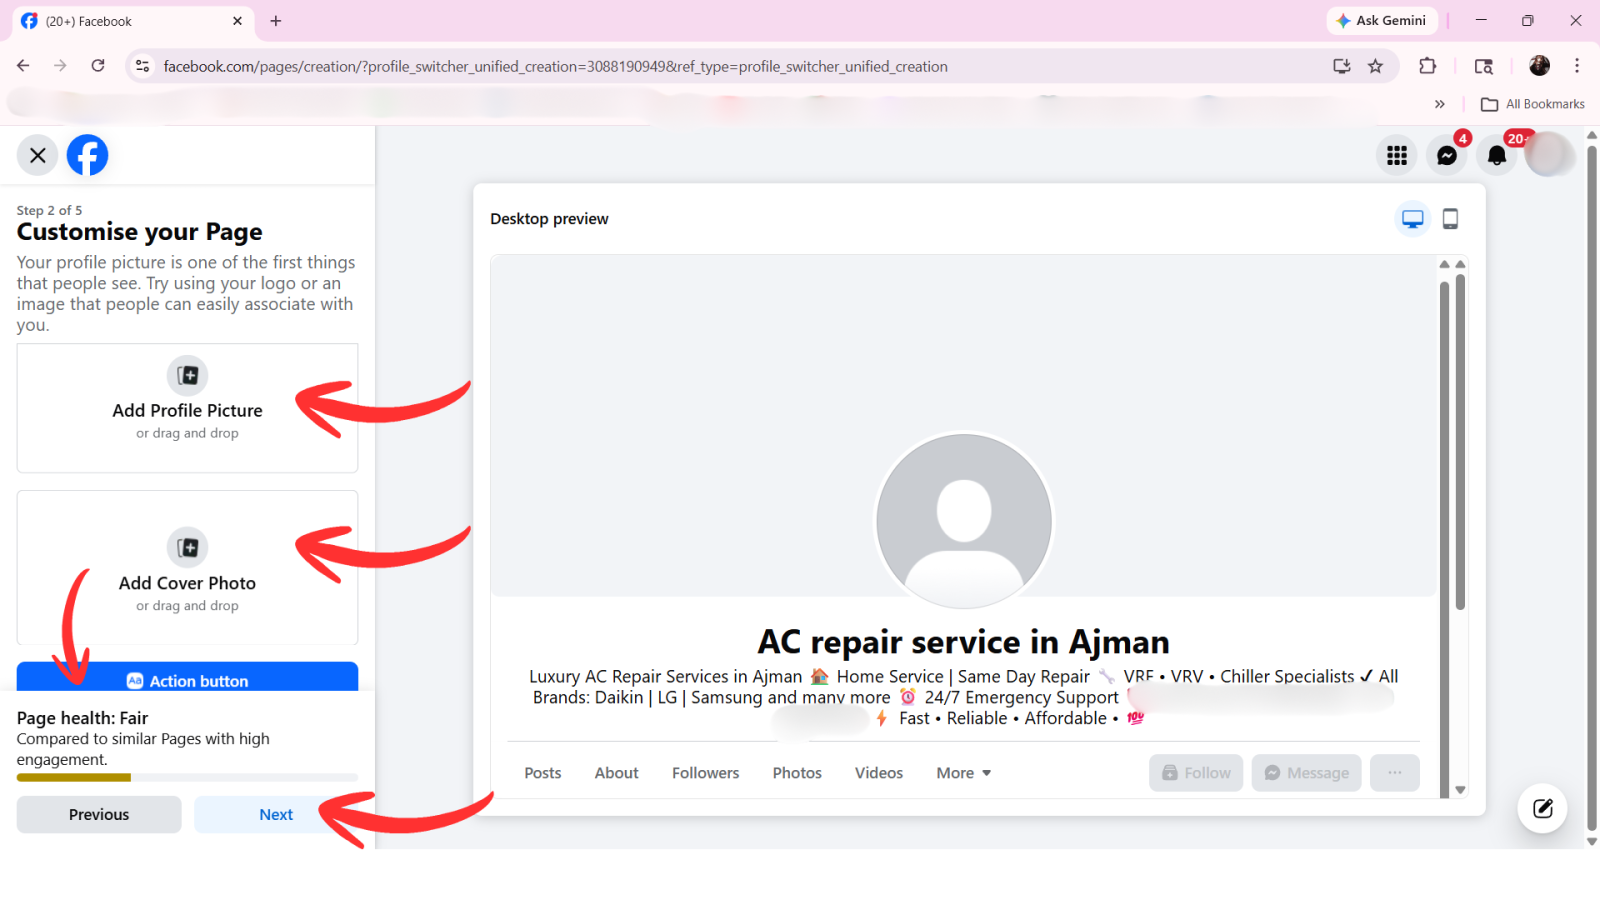
After adding your contact details, the next step is to set up your page’s visuals and action button on Facebook.
Upload your business logo or a clear brand image. This image appears as you facebook page name
Tip: Use a high-quality, square image (logo works best)
Upload a cover image/banner that represents your business. This is the main image shown at the top of your page
Tip: Use a clean and attractive design that highlights your services
Choose a call-to-action (CTA) button for your page
Common options: Call Now, WhatsApp, Contact Us, Book Now
Select the option that matches your business goal
What to Do Next
Upload your profile and cover images, Select an action button. Click on Next or Save to continue
Congratulations! Your Facebook Page has now been successfully created. Now your page is live, and people can start finding and following your business.
Everything you need to know about Google Tag Manager, from basics to advanced implementation

Grow your business with best performance marketing strategy
© 2024 DigiTechGrow. Developed by DigiTechGrow.
